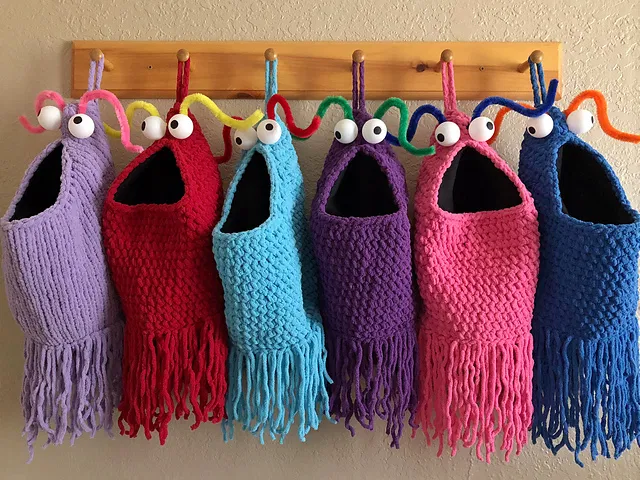
We begin by stepping into the playful world of Yip Yips, those quirky, lovable aliens from classic children’s TV. Before the making starts, I guide you through everything you need: your yarn choice, the right hook or needles, ping-pong balls for the eyes, pipe cleaners for the antennae, and a soft piece of black fabric for the lining. I also share the finished dimensions and gauge so you’ll know exactly how your Yip Yip will turn out. Whether you’re crocheting or knitting, this step prepares you with all the essentials.
Next, I break down the abbreviations and stitches you’ll encounter throughout the project. This section sets you up for success by explaining the technical language used in both versions of the pattern. I also walk you through how the Yip Yip is constructed: starting from the rounded base, shaping the mouth opening, forming the head, and finishing with the iconic tentacles, eyes, and lining. This foundation makes the upcoming steps feel straightforward and approachable.
Now we jump into creating the crochet version of the Yip Yip. We begin at the center of the base, working in continuous rounds and gradually increasing to form its wide, rounded body. You’ll learn when to switch to back-loop stitches, which are reserved for adding the tentacles later. Once the lower body is complete, we transition into rows to shape the mouth opening, then return to rounds to close the top of the head. By the end of this step, the classic Yip Yip silhouette is fully formed and ready for details.
For the knit version, we follow a similar structure but use increases and short rows to sculpt the mouth and head. I walk you through forming the base, adding height, and creating the purl ridge—the spot where tentacles will later attach. The short-row shaping gives the mouth its iconic open look. After forming the hanging loop, we close the top of the head with clean decreases. When this step is complete, you’ll have a fully knitted Yip Yip shell brimming with personality.
With the body complete, it’s time to bring the Yip Yip to life through its signature tentacles. Here, I guide you through cutting long strands of yarn and attaching them one by one to the front loops or purl bumps you saved earlier. Each strand is folded, pulled through, and secured with a simple knot. This process is rhythmic, fun, and instantly transforms your project into something animated and full of movement.
Now we craft the expressive features that define every Yip Yip. Using ping-pong balls and pipe cleaners, I show you how to pierce small openings, feed through the pipe cleaners, and secure everything neatly inside the fabric. The antennae are shaped, twisted, and arranged so they stand proudly on top. You then personalize the eyes by drawing wonky, charming pupils—perfectly imperfect, just like the classic characters.
The final step is giving your Yip Yip a clean interior. We fold and cut the lining fabric, sew the edges and corners, and create a shaped insert that slides snugly into the body. With a few simple stitches around the mouth, the lining settles in place beautifully. Once secured, your Yip Yip is officially ready to hang — whether as a decoration, a storage pouch, or simply a cheerful companion.


